
Got an itch for a new project? I feel like I do most of the time. And most of the time they require my husbands assistance. He’s a very patient and understanding man! 😉
Over the years these really simple and cheap home projects have become my favorites and have made one of the biggest impacts on my home. And when I say cheap, I mean CHEAP!
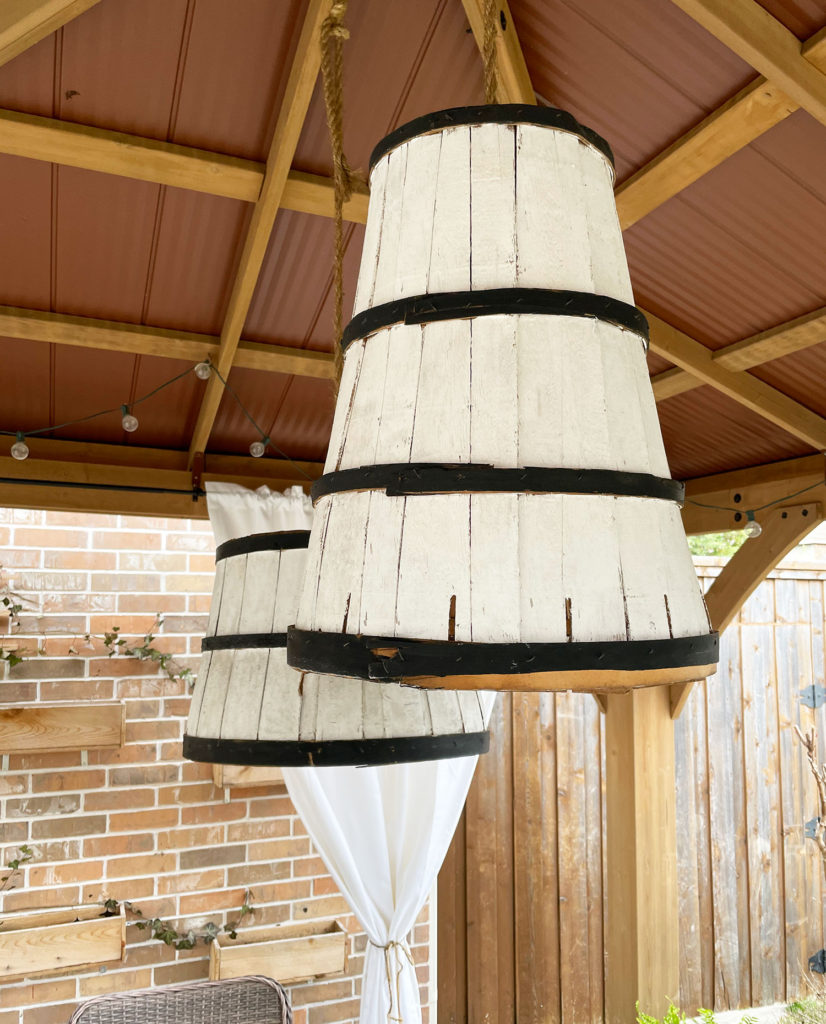
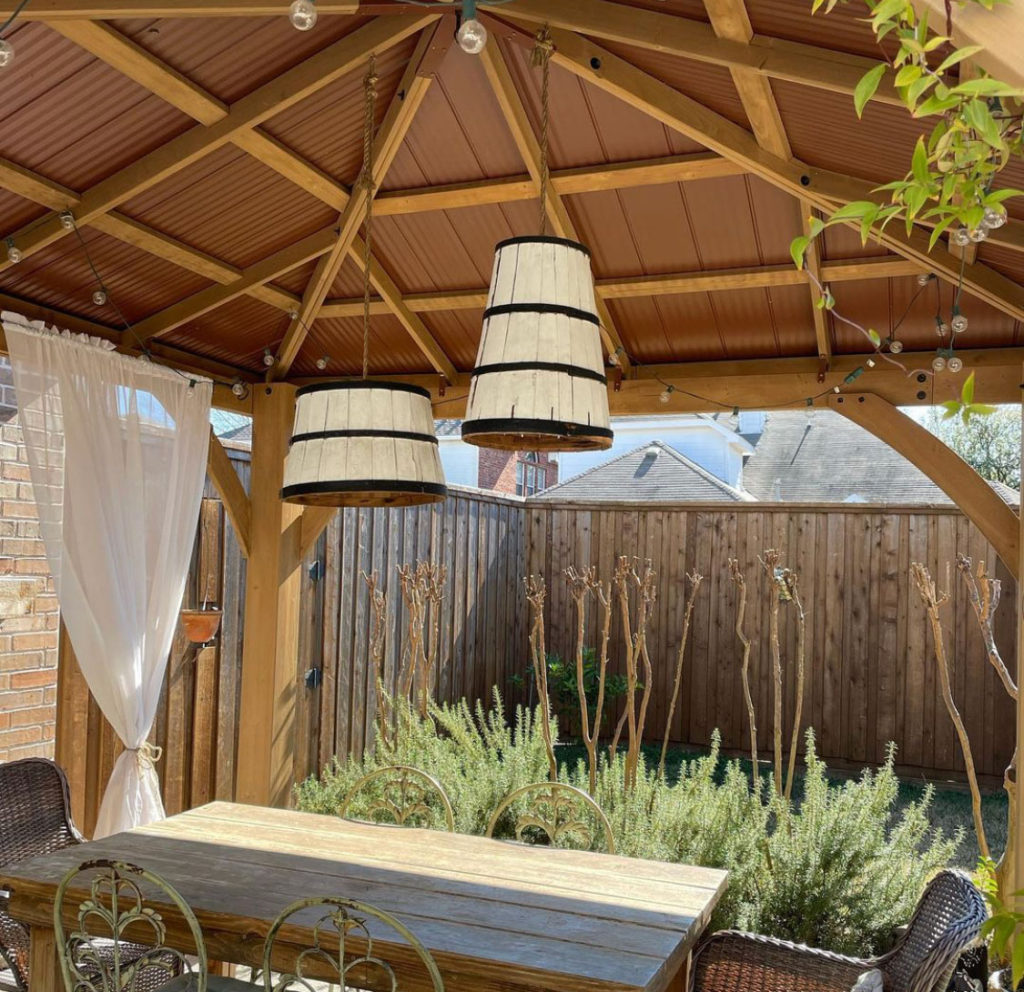
HANGING BASKETS
I am a sucker for baskets, whether they are displayed as wall art, hanging as lights or full of muffins! I love the natural color and texture. They go with every aesthetic and add a warm cozy vibe. A few years ago we redid our backyard and I got a “vision” of what I wanted. I became obsessed with hanging baskets. I searched and searched and searched for ideas and inspirations. Well thank you Pinterest for giving me lots of ideas! I mean, honestly what would we do without it?!
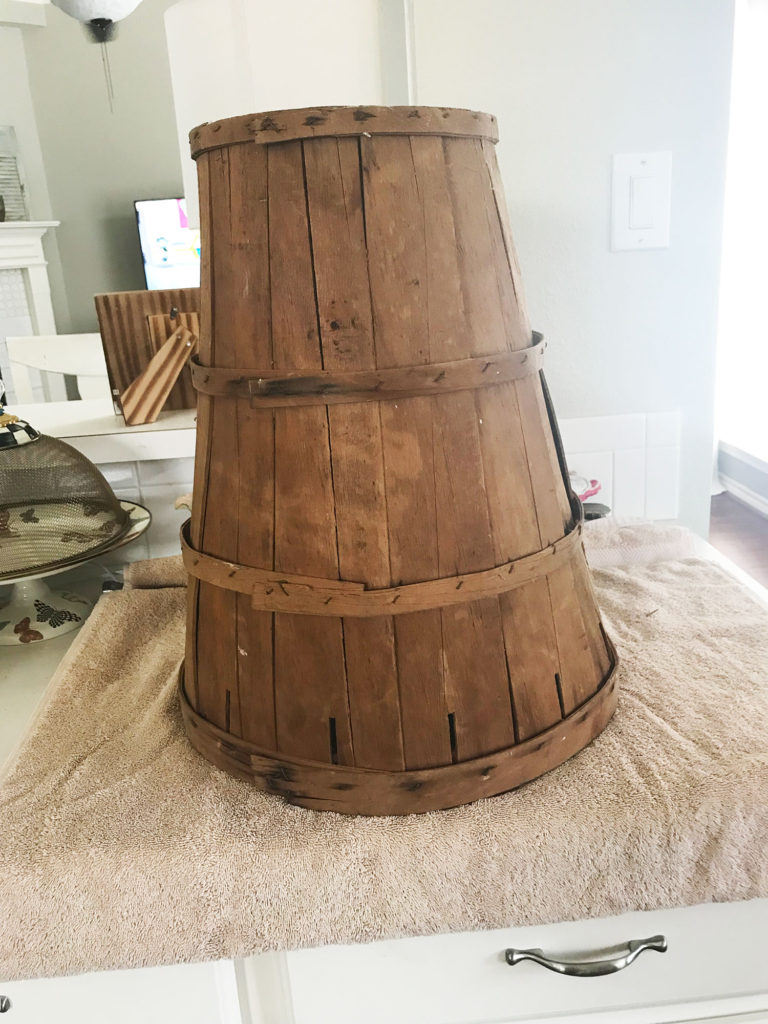
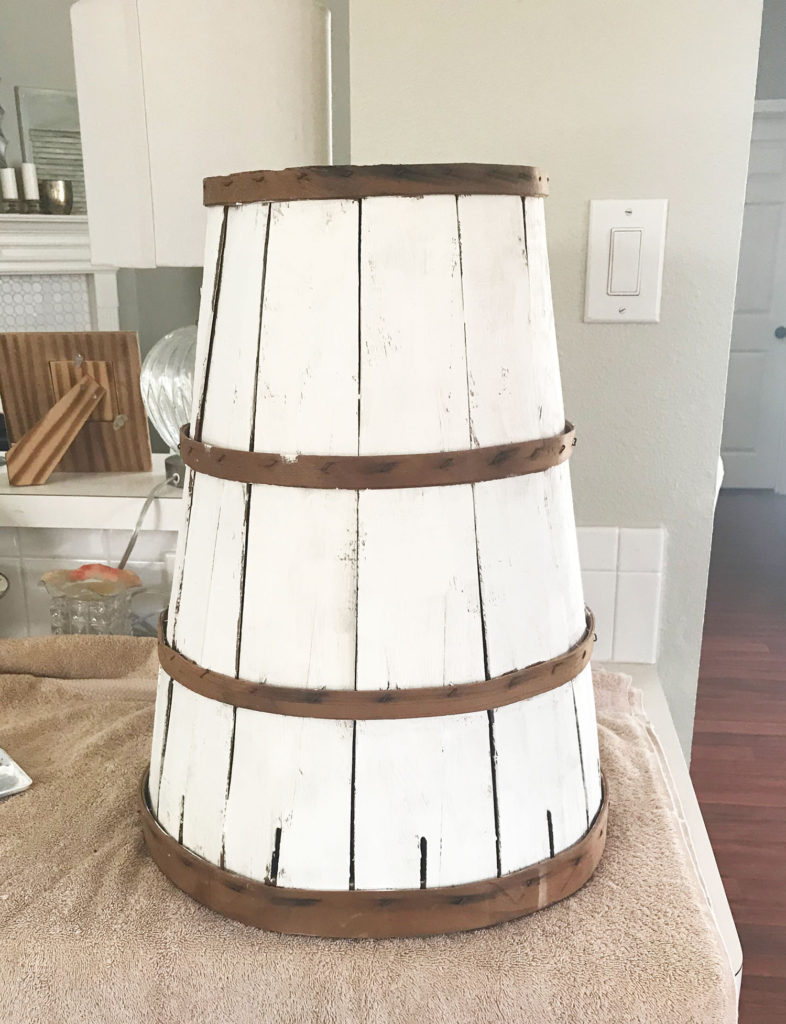
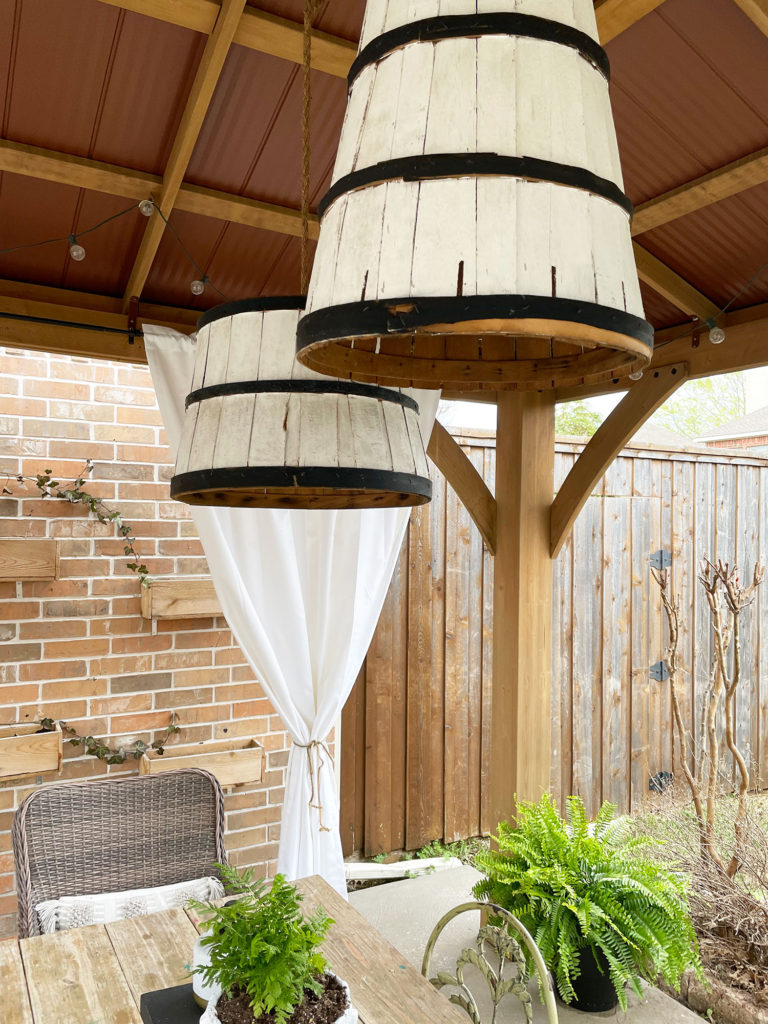
So I was on a mission to find baskets. One lovely day I came across some bushel baskets on Facebook garage sale. They were legit 20 bucks. See I said cheap! I knew I wanted to paint them black and white. Another obsession! I already had some paint from previous projects. So I cleaned them up and got to work. Took no time at all. I painted the body white and the trim black. Drilled a hole in the top and added some thick twine rope. And bam!
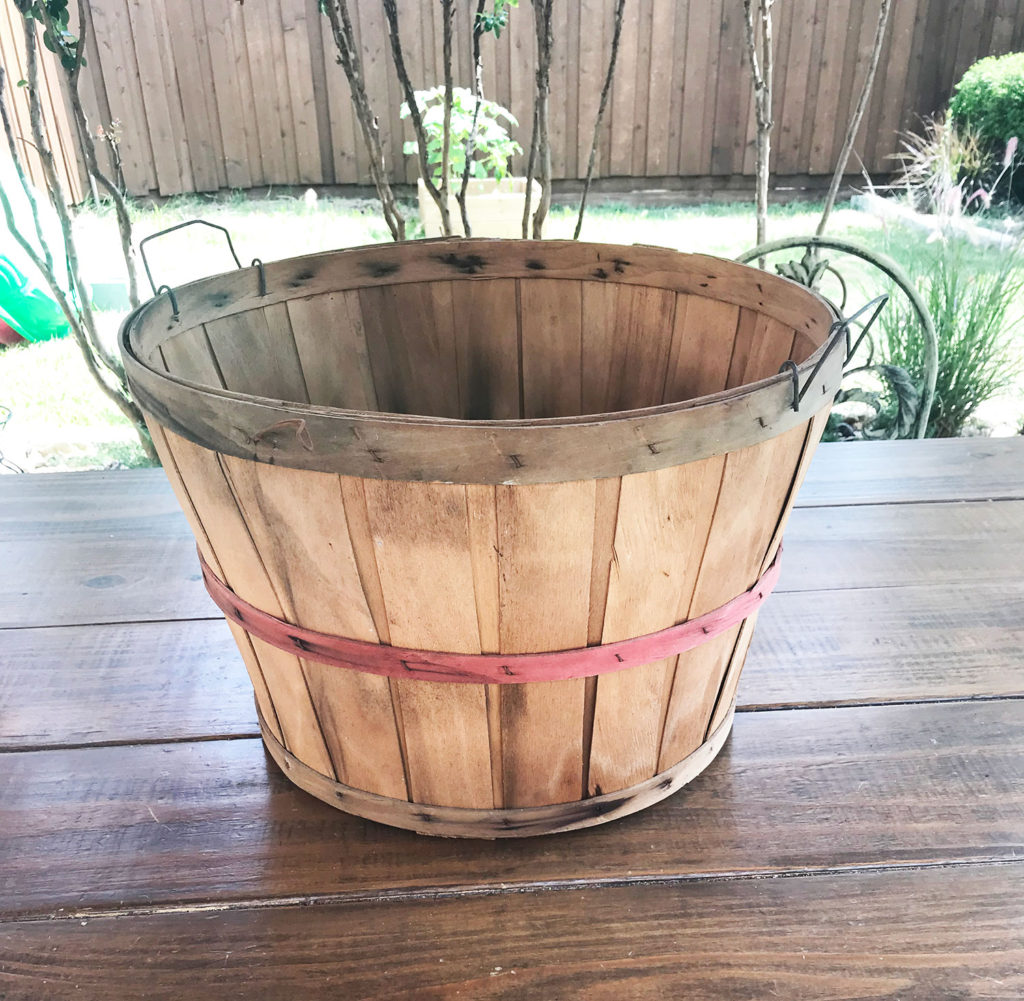
These beauties complete my backyard. Now keep in mind they are not working lights. Purely for decoration, and I am OK with that. I have hanging lights, lanterns and liquid citronella burners. So there is plenty of glow elsewhere! And you could use any type of basket. Really a great opportunity to get creative!
EXTRA LARGE LAMPS
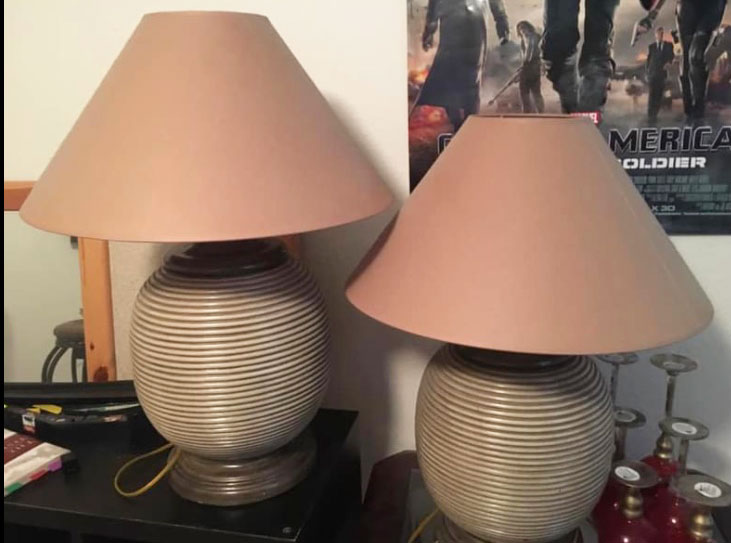
When I say the word “lamp” my hubby covers is ears and runs! Literally. I feel comfortable admitting that I have a bit of an issue when it comes to lamps. I get an idea in my head and that’s what I want. However, often, actually many times I cannot find what I want and then I become impatient and this is when the problem comes in. I end up settling and buy lamps (yes plural) annnnnd then hate them! I returned and revamped so many lamps. And not to mention my kids ALWAYS managed to break the ones I actually like. See my point with issues?!
All that aside. Very large lamps are trending, you’ve probably seen them all over the place. Studio McGee is the ultimate large lamp guru. Large also means very pricey. But if you know what to look for you can find and create exactly what you want. Now I love garage sales, antique stores, and salvage stores. You can find some really amazing treasures for great prices.
I happen to find these hideous beauties on Facebook garage sale. Both for $40. They are VERY large and heavy and well made. These lamps are the perfect size and shape. I love the ribbed body and the detail on the top and base. All they are in need of is a little TLC!!
Decided to go with a gloss white spray paint for the body. I didn’t bother taping for the this first step. Already knew I wanted to paint the top and base black so didn’t matter how messy they got. After a couple of coats and drying time I moved them inside. I then taped off the edges. I used a black acrylic paint. Then the dirt method – mix a little dirt with water and rub it onto the already painted area. Just using your hand, rub the damp dirt into the surface. You will see if start to create a “aged” look.
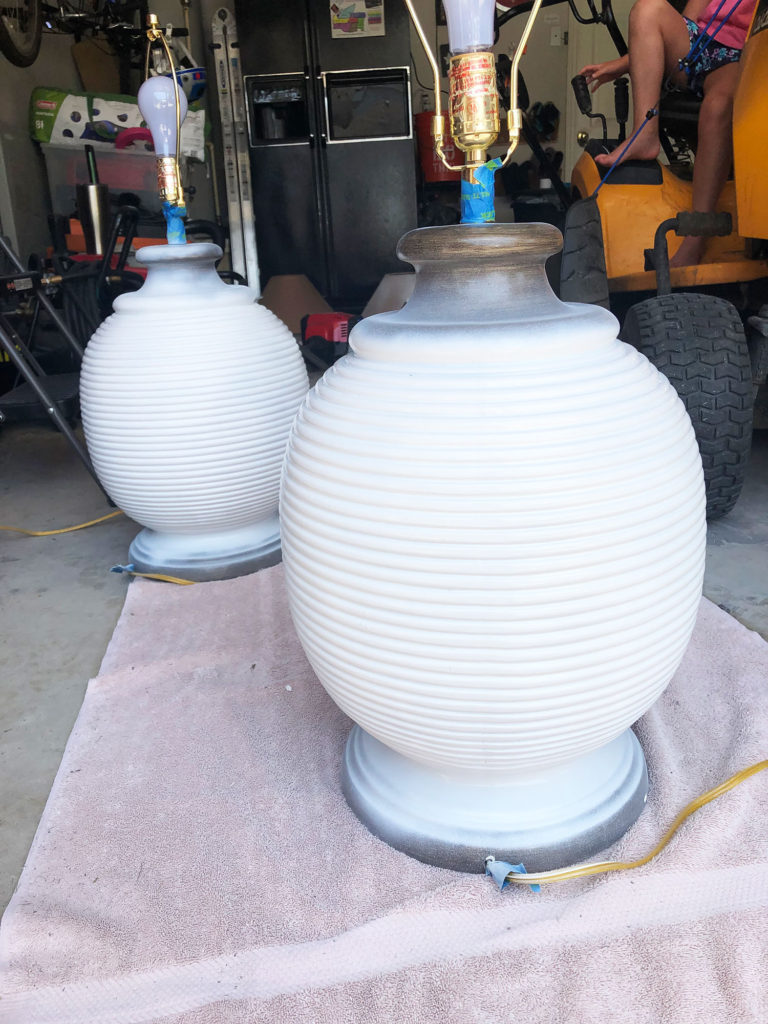
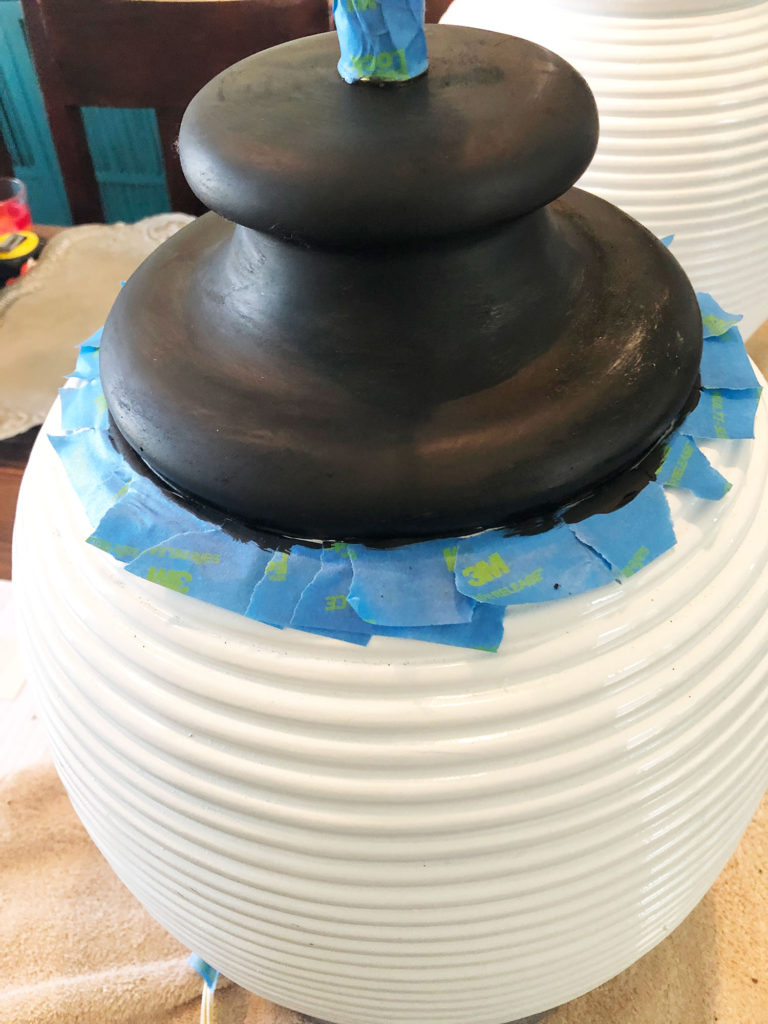
Once the surface is covered in the dirt mixture just gently dust it off with a paper towel. Once everything is clean and dry, remove your tape. You now have these beautiful, one-of-a-kind lamps!
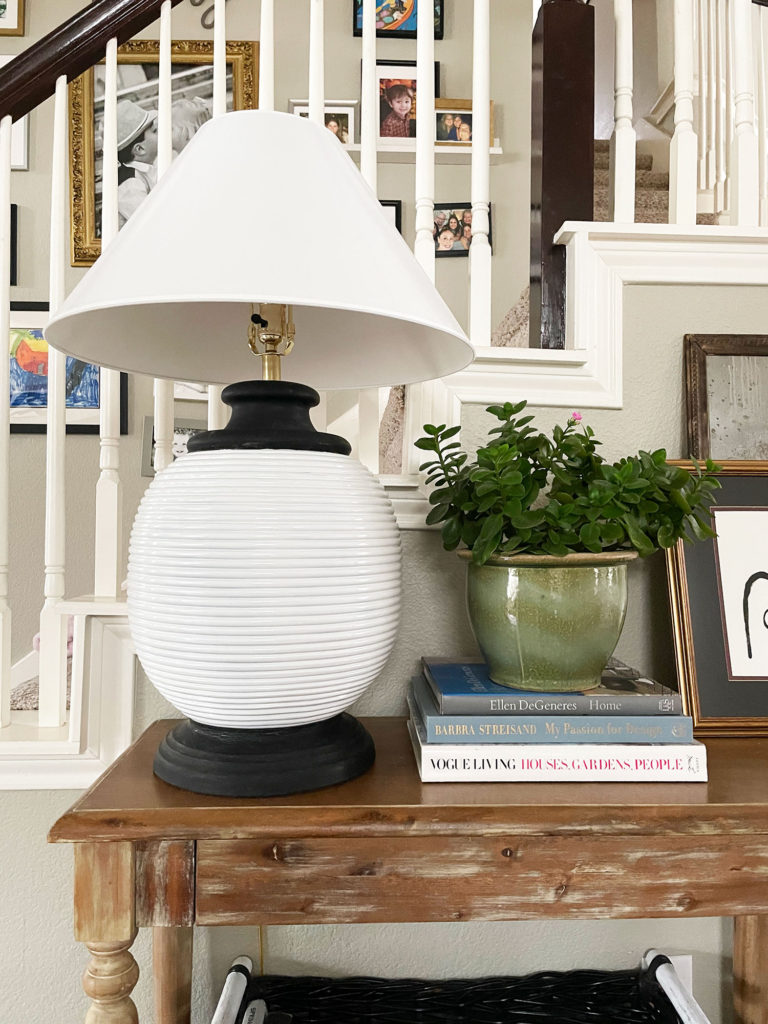
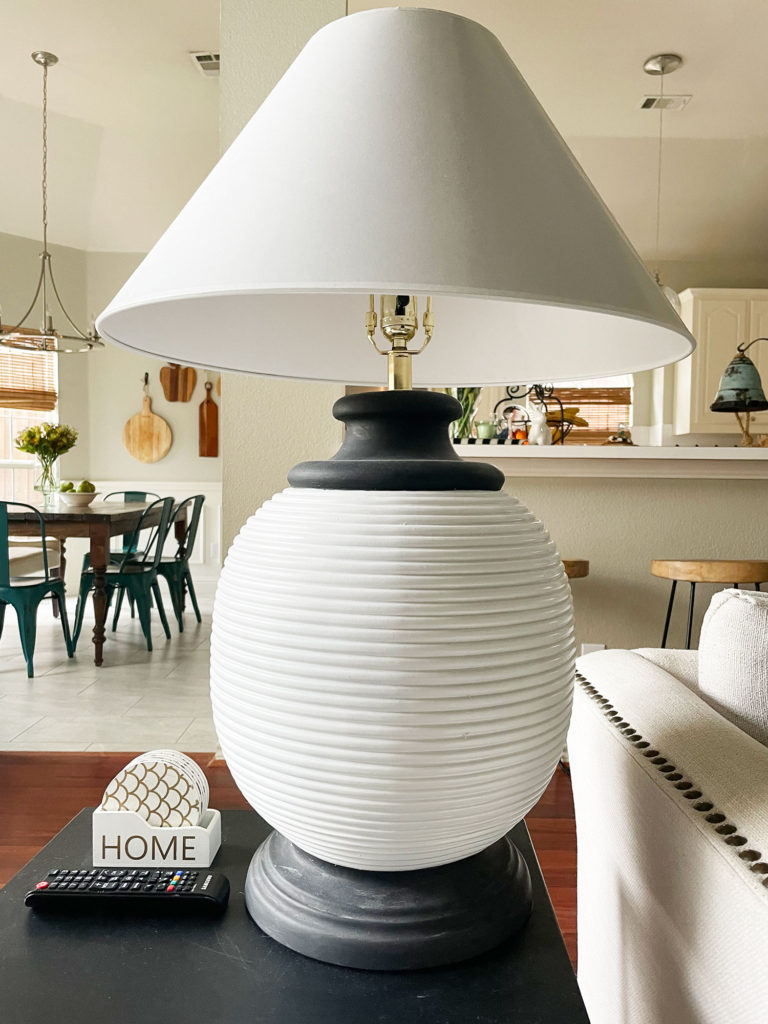
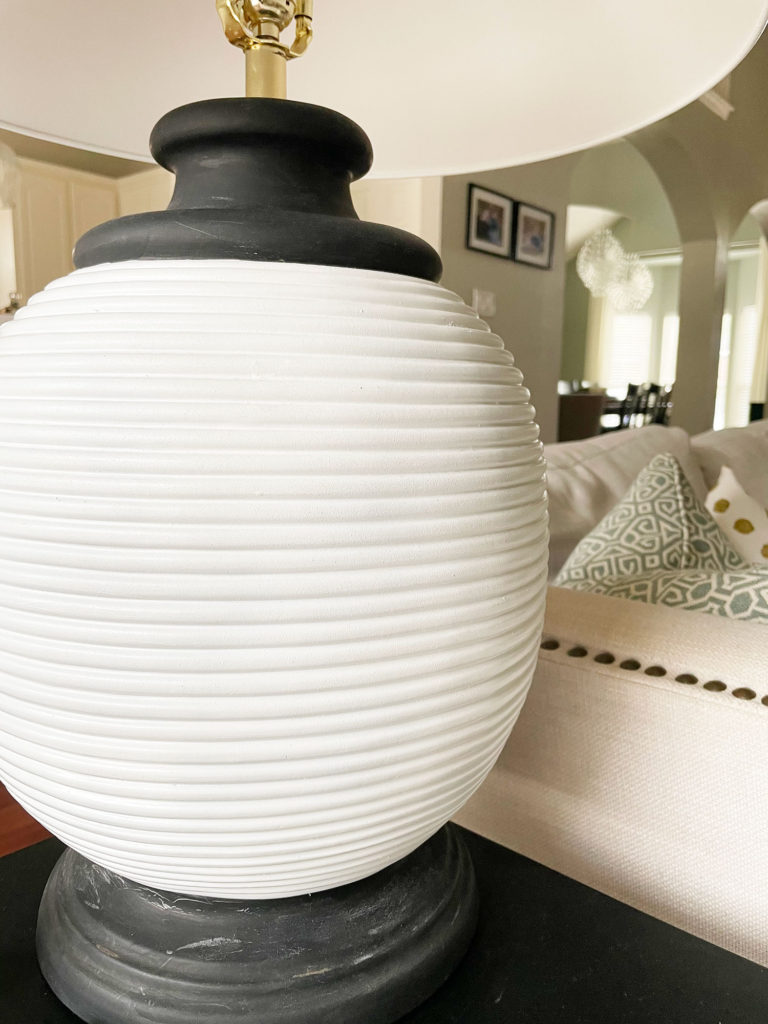
Really love the way these turned out. I love the contrast and the textures. However, I did replace the shades with these crisp white empire shades. They are timeless and I will be enjoying for years to come. Fingers crossed! 😉
SHIPLAP
Yes, I know it’s been around for a minute and is all over place. BUT it’s that way for a reason. Such an easy and inexpensive way to really add some character to your space. And your options are plenty. You can paint, stain, use as an accent wall, chair rail, backsplash, etc. The list goes on.
We have it in several areas of our home. It really ties everything together and makes it cohesive without over doing it. Including above the fireplace, powder bath and kids bath, my wanna be bar area and my son’s room.
We first added shiplap in our powder bath. We gutted the whole bathroom so it was incredibly easy to install. First determine how high you want it and then you can figure out how many pieces and width choice you want to go with for the wood. We used a sheet of pine plywood board from Home Depot. Now you used to be able to have them cut the boards to size on site. However, since Covid I cannot guarantee that is still true. I do know there is a cutting station set up for the customers to use. Or if you have the equipment, you can always cut the boards at your home.
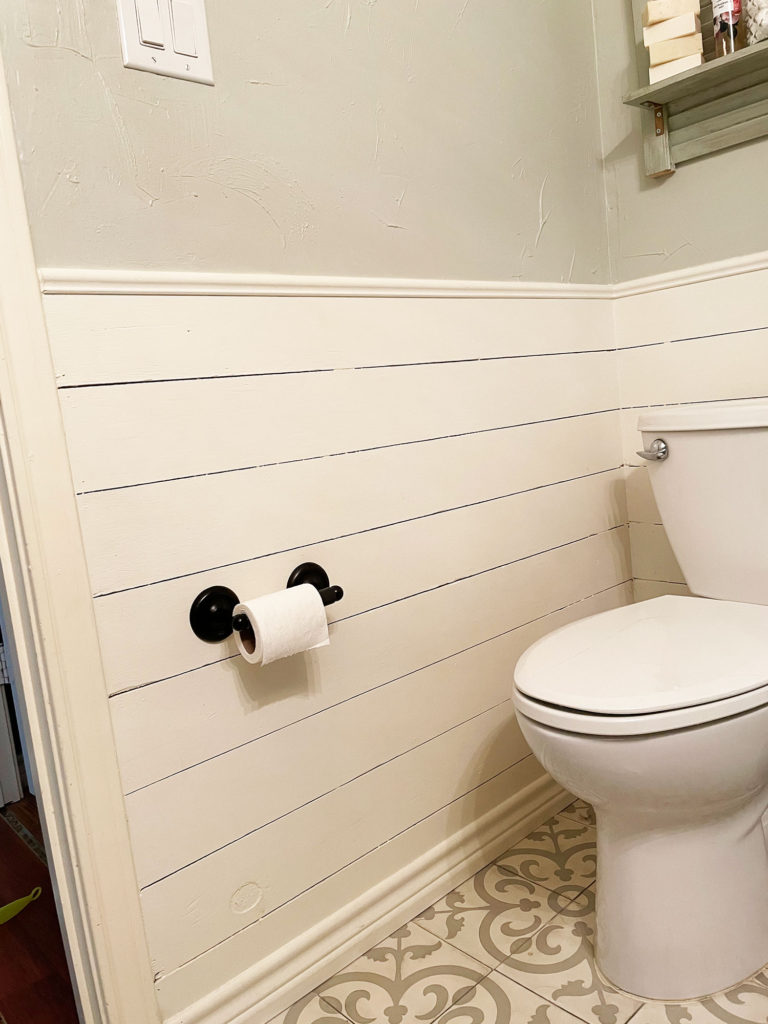
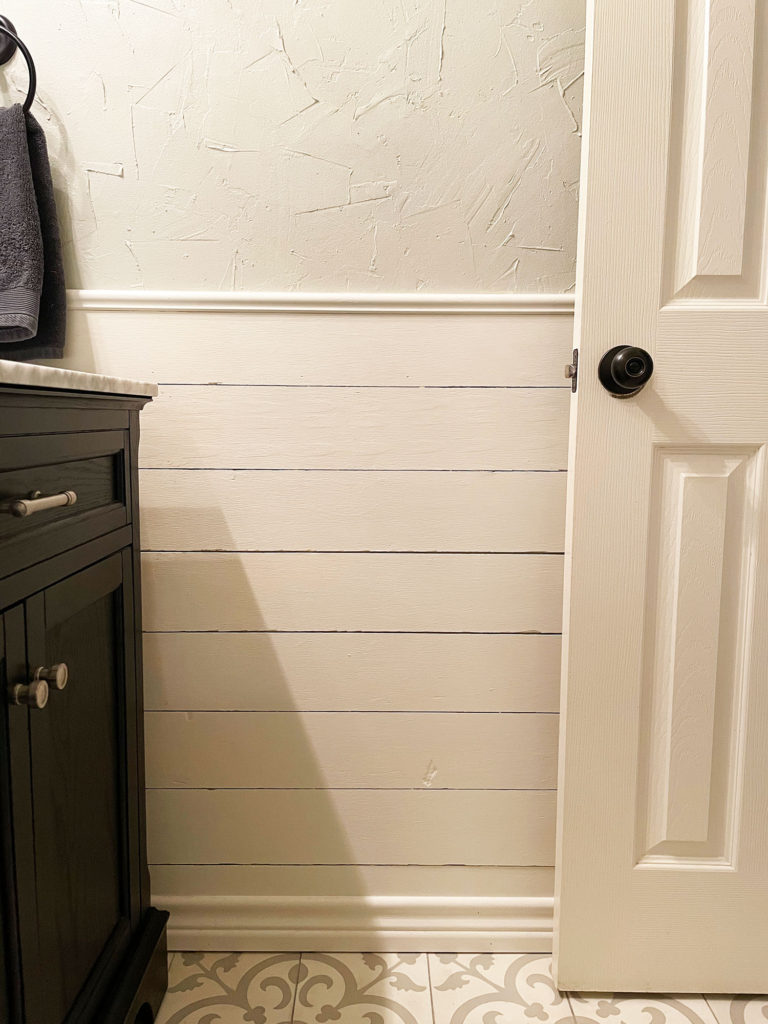
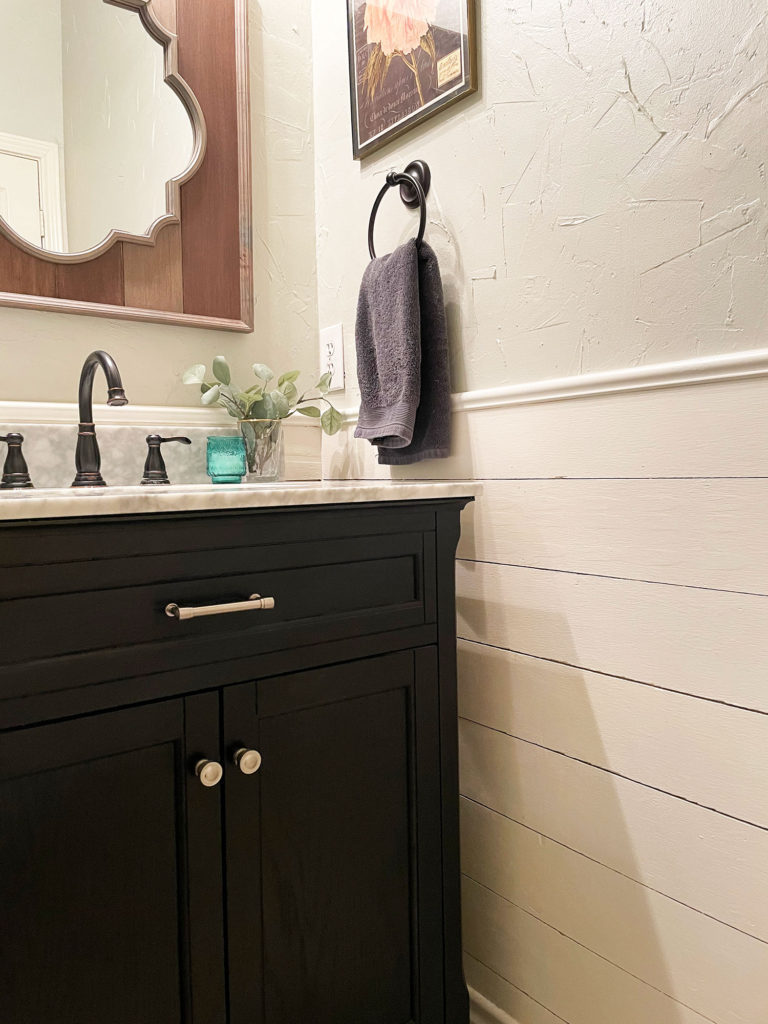
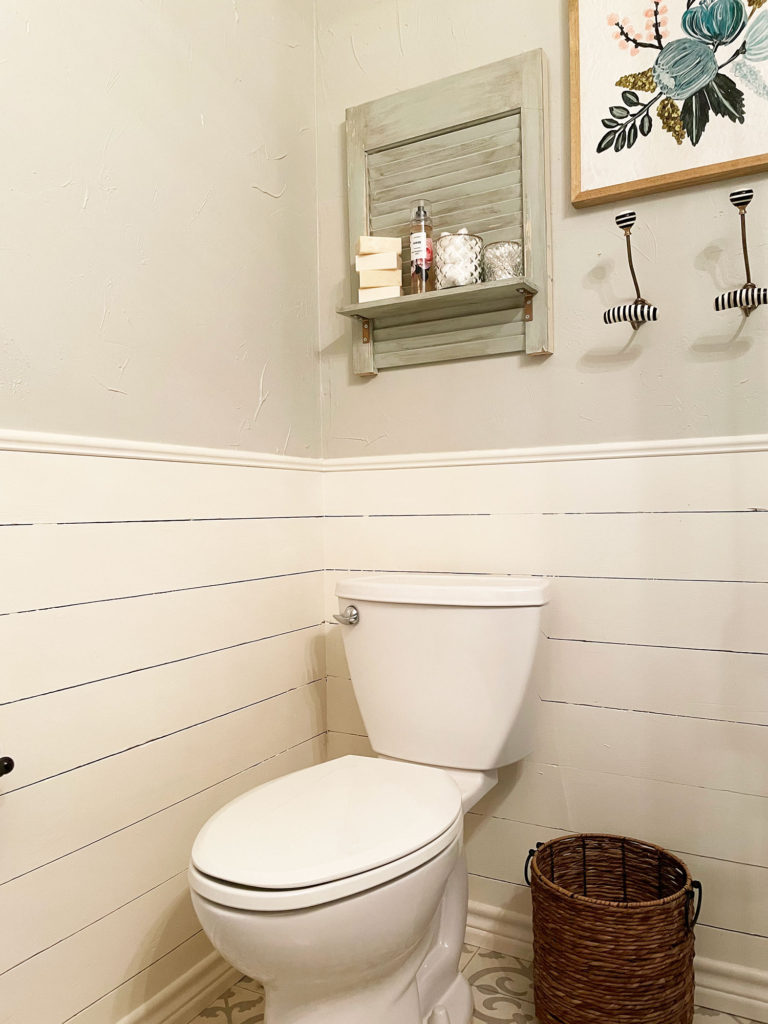
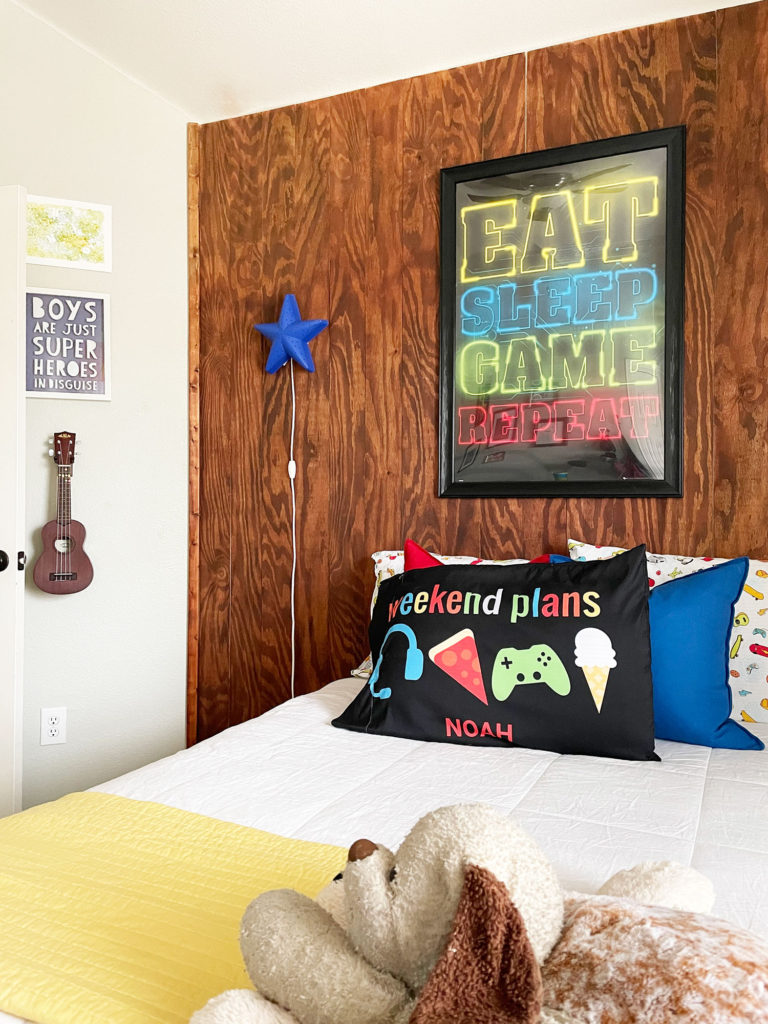
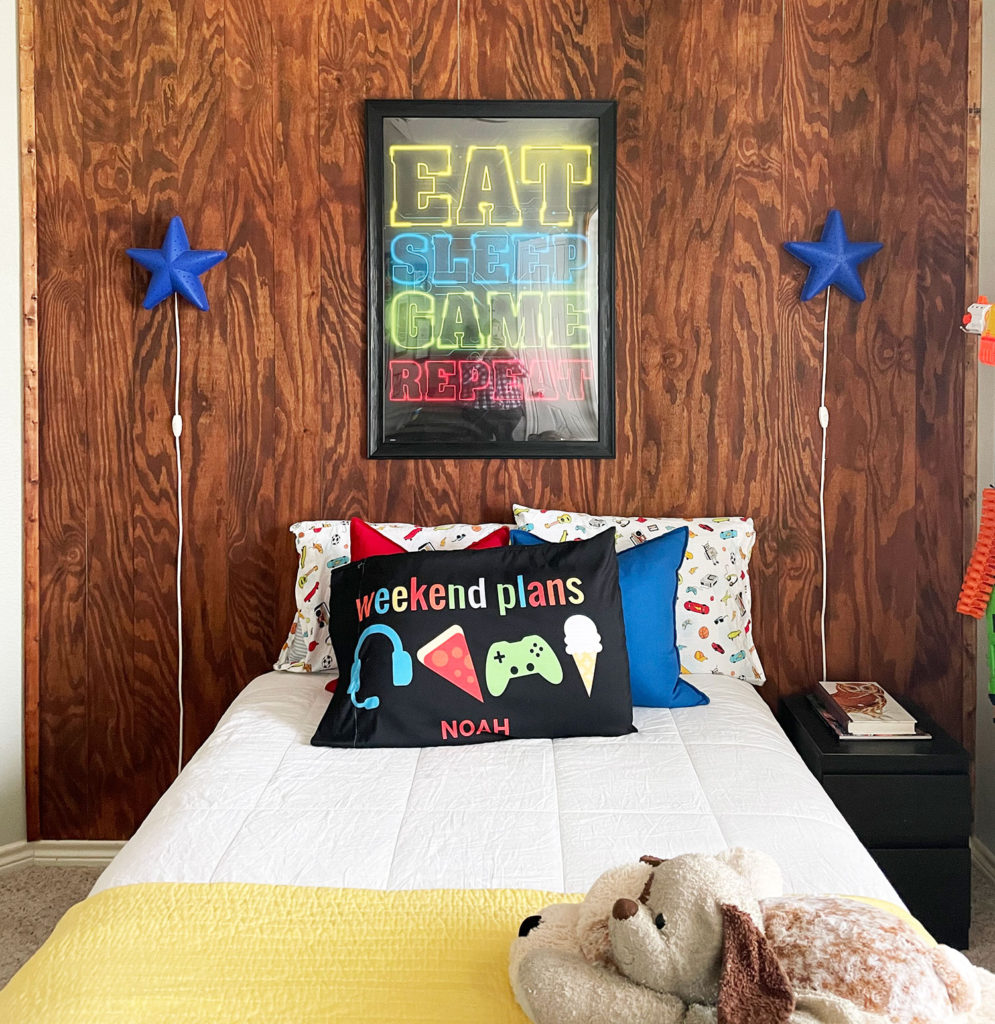
Once you have figured out your size and quantity all you do is staple those babies to the wall. We went with 5 inch boards throughout and used a nickle as a spacer. Except in Noah’s room. Just butted the boards right up to each other.
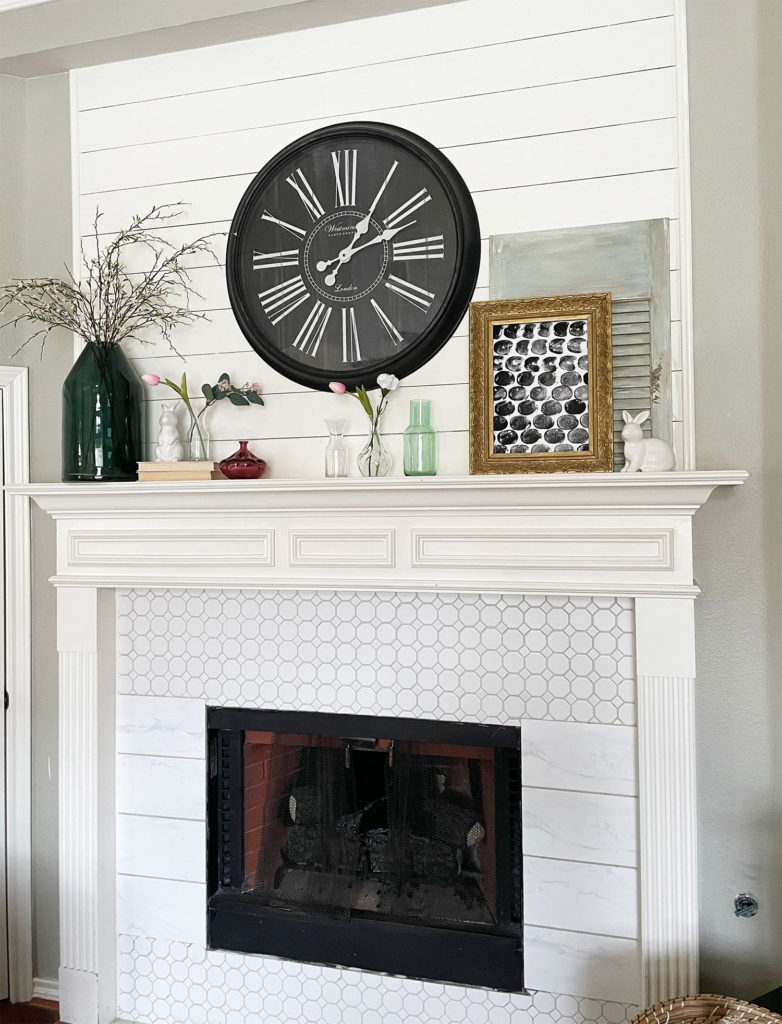
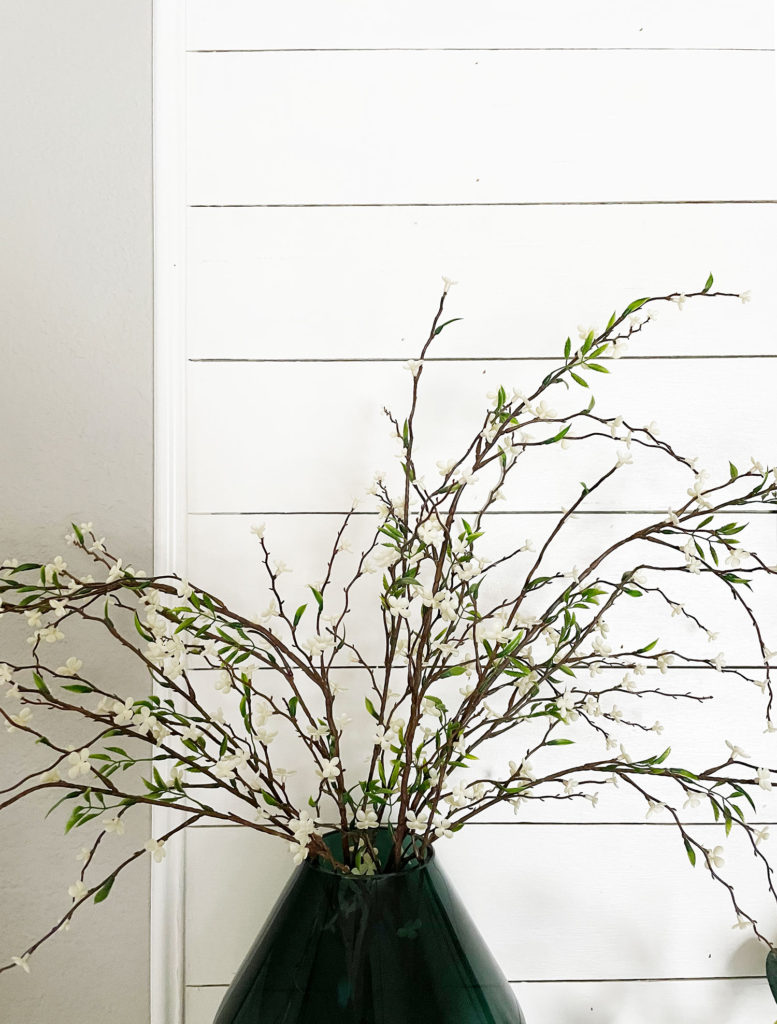
The next area we did was the fireplace. It was just a large space of drywall. The shiplap adds nice texture and color contrast. So simple my husband, and at the time, my 7 year old son did this job! Affordable, crazy easy to install and creates such an impact. I fully understand why Jo Gaines is a super fan! 🙂
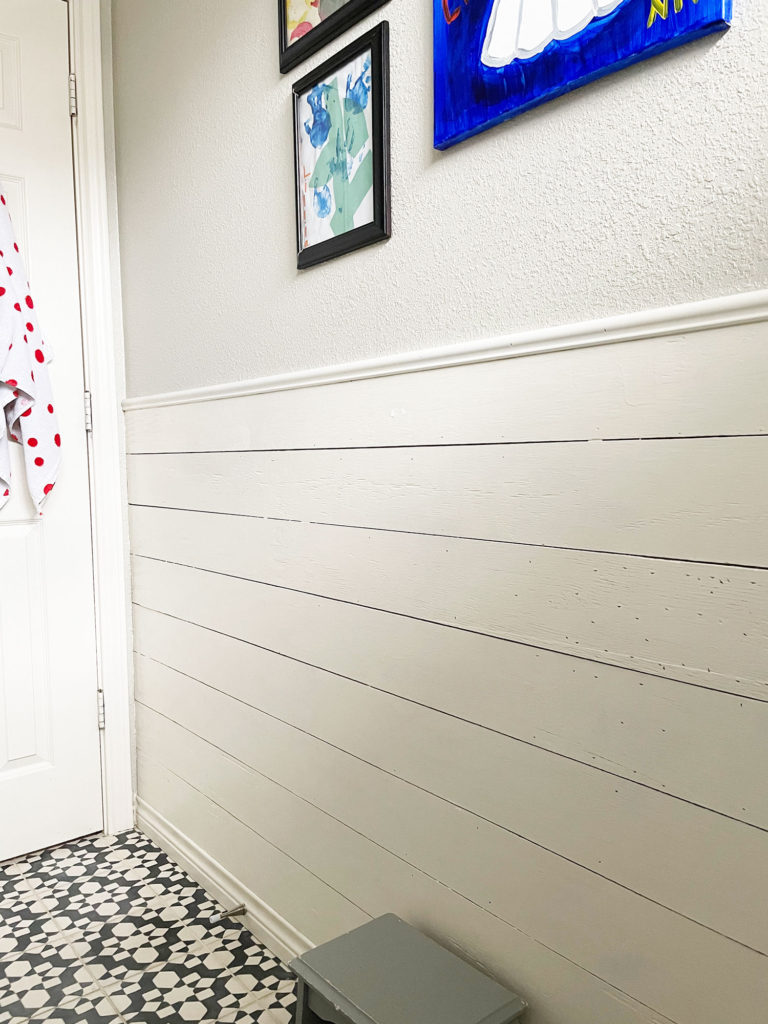
We also did a few spaces upstairs. A small wall in the kid’s bathroom. I like the way the shiplap and cement tile tie together with the powder bath.
Then we mixed it up. We added an accent wall in my son’s room. But instead we ran the shiplap vertically and stained it. No spacing between the boards. I wanted a more modern vibe. I love how warm and cozy his room feels.
If you have any questions about any of these projects, I love would to hear from you! Or I’d love even more to see some of your favorite projects.
For the complete Powder Bath Transformation click here.
Happy Projects!
XOXO, Ivy

1 comment